Once you have added a workflow to your customer account in FinView, you will need to activate it for it to be put into action. Here's a step-by-step guide on how to do this:
Step 1: Access the Workflow
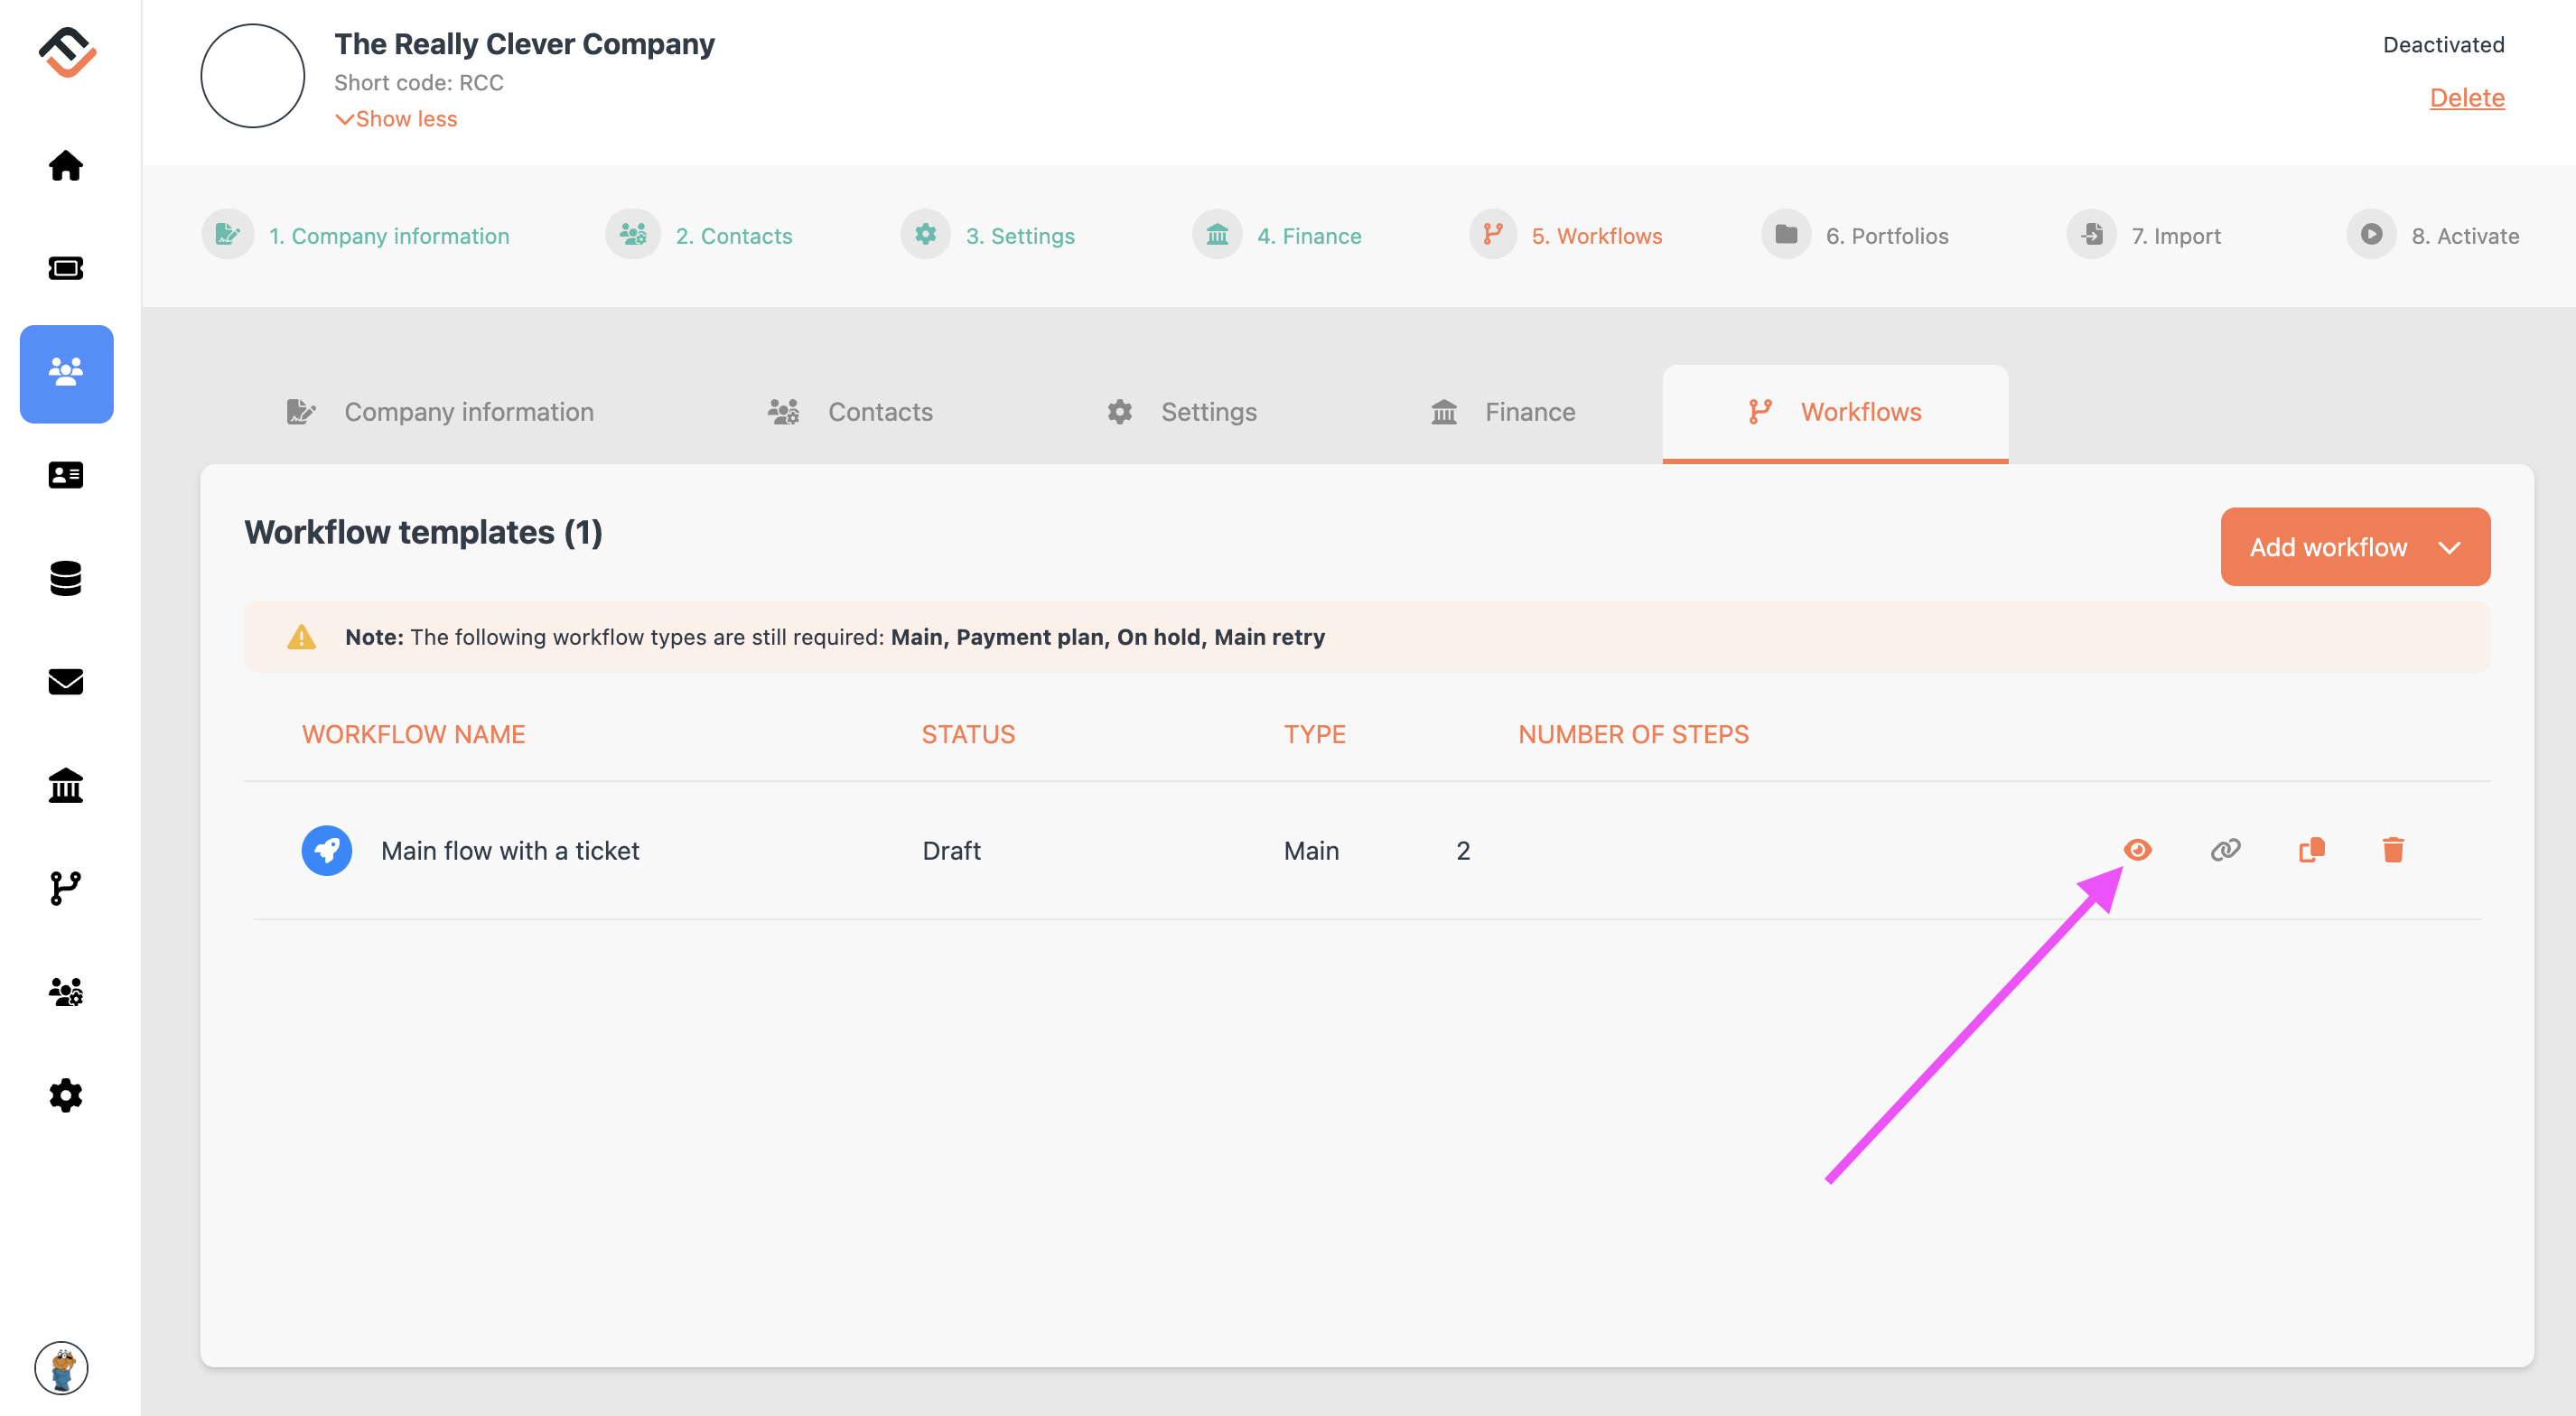
Navigate to your workflow list within your customer account setup. Here, you'll see the workflow you've just added. Click on the 'eye' icon to enter the workflow settings.

Step 2: Edit Workflow Settings
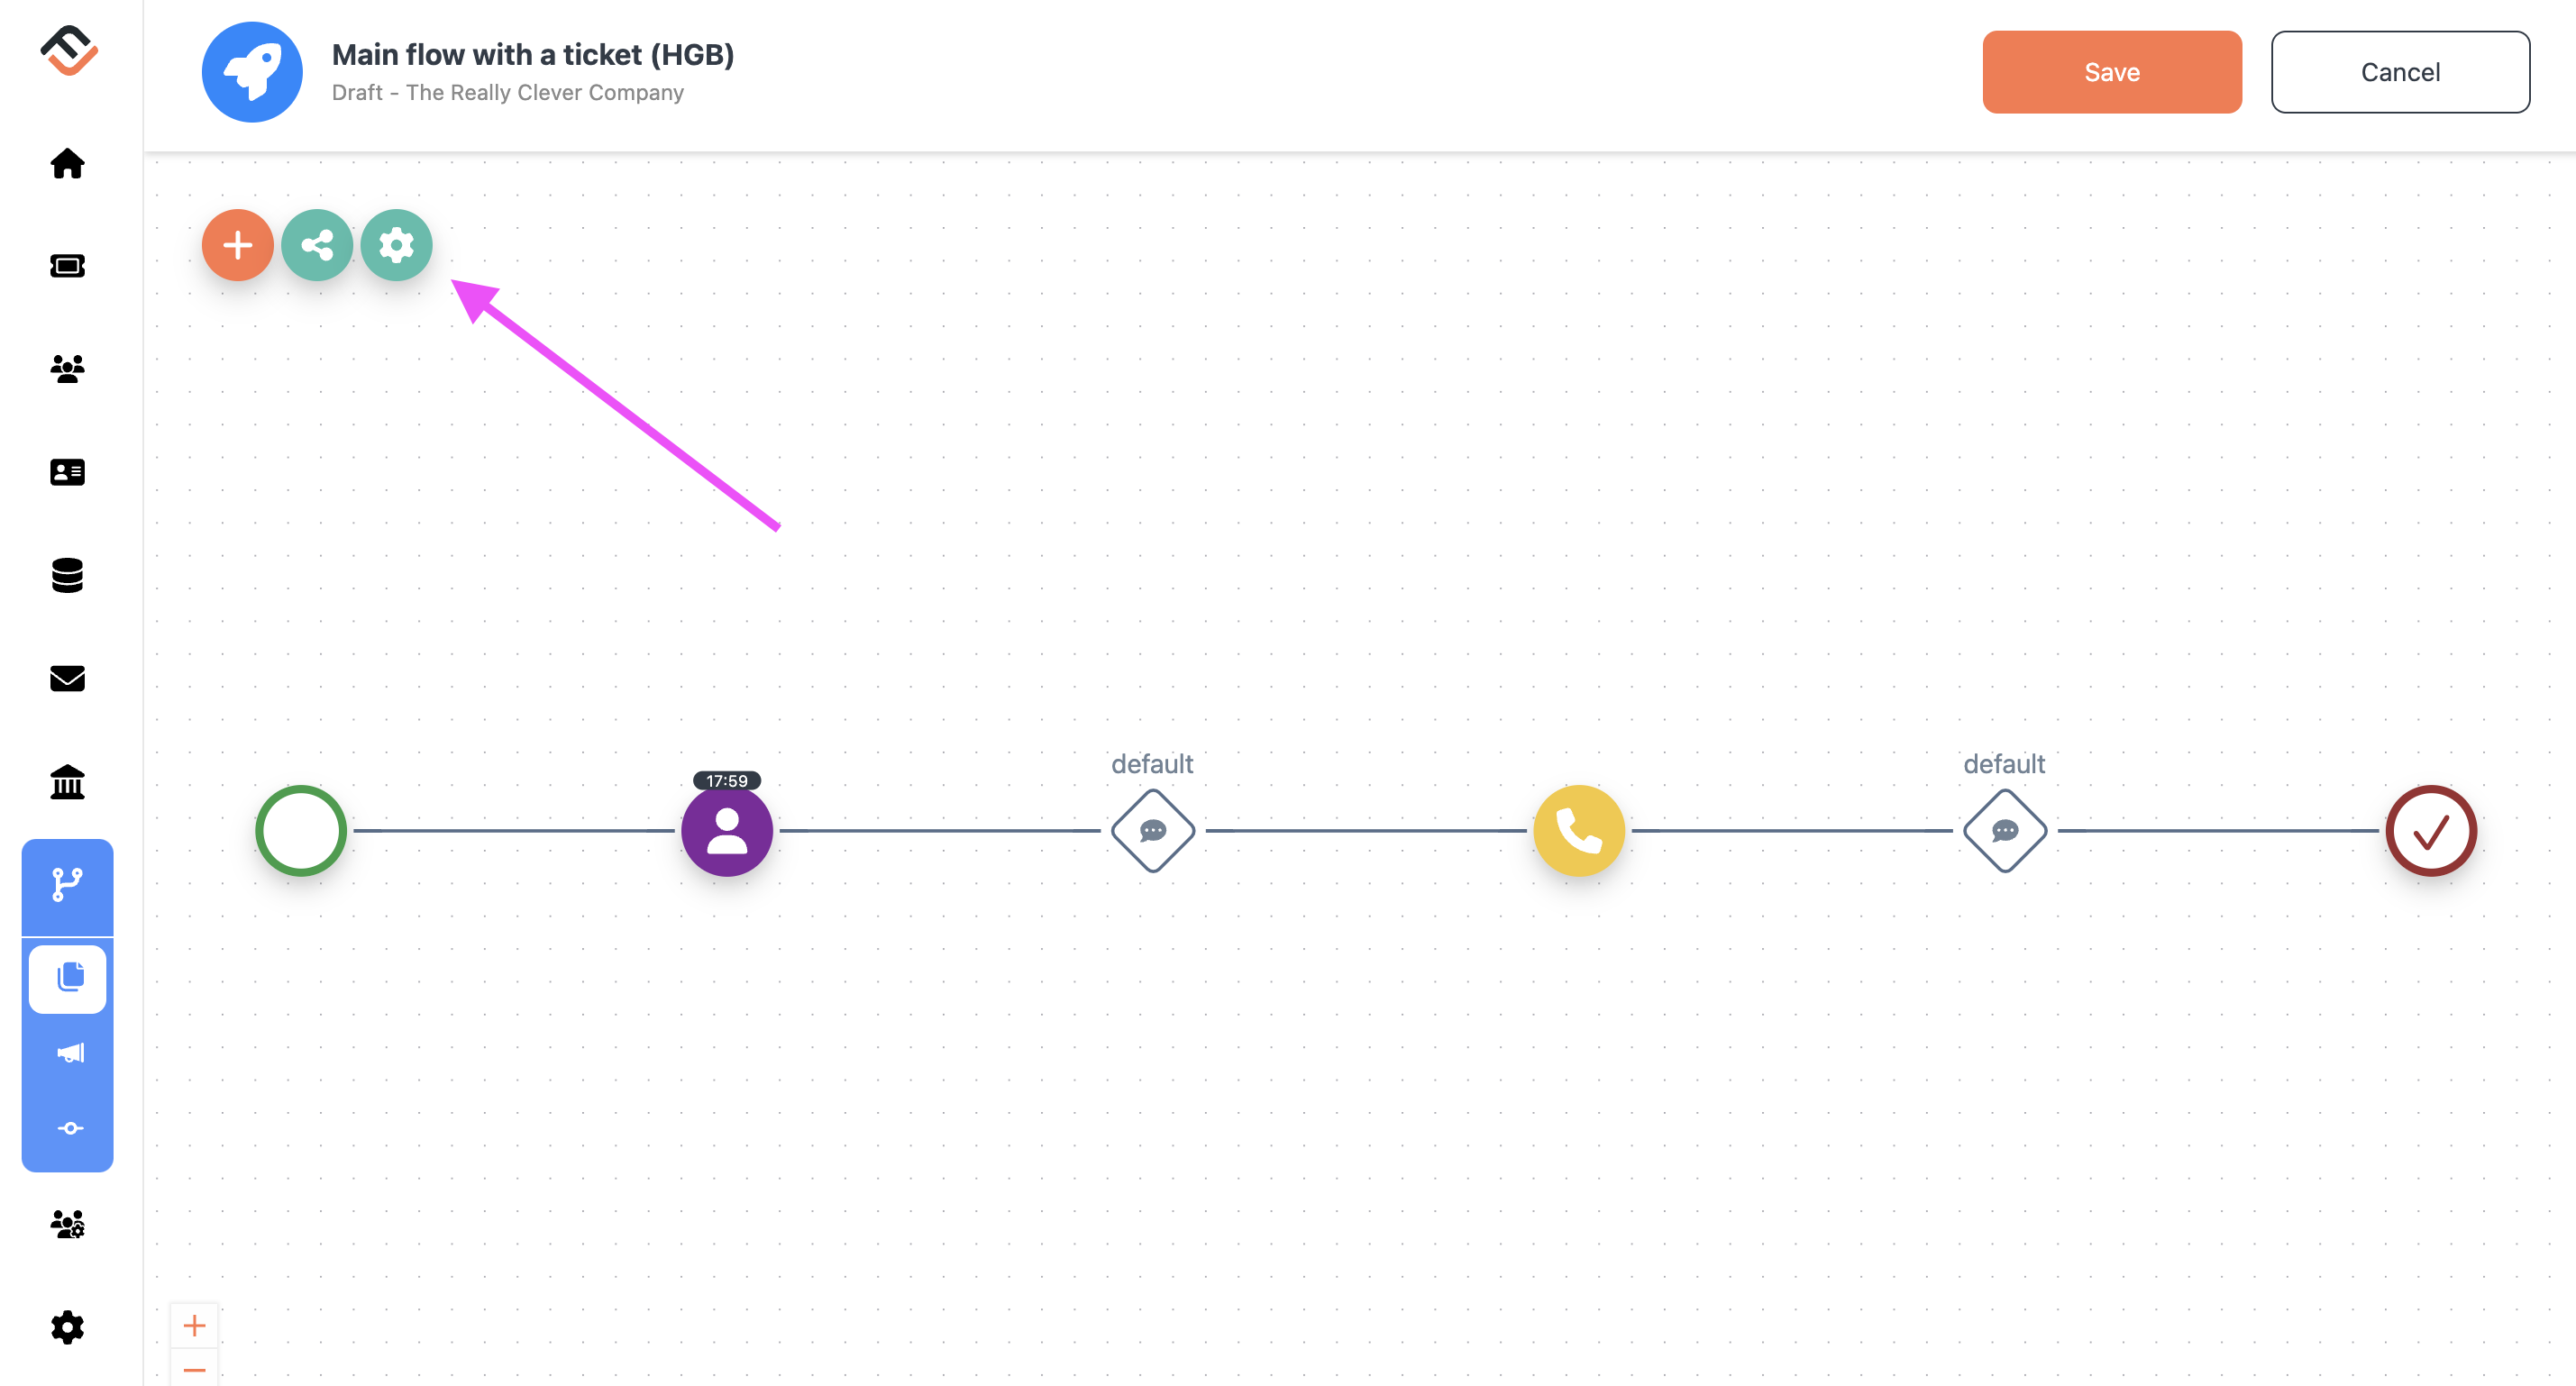
Locate the 'gear' icon in the top left corner of the workflow settings page, and click on it. This will open the 'Edit Workflow' settings.

Step 3: Change the Workflow Status
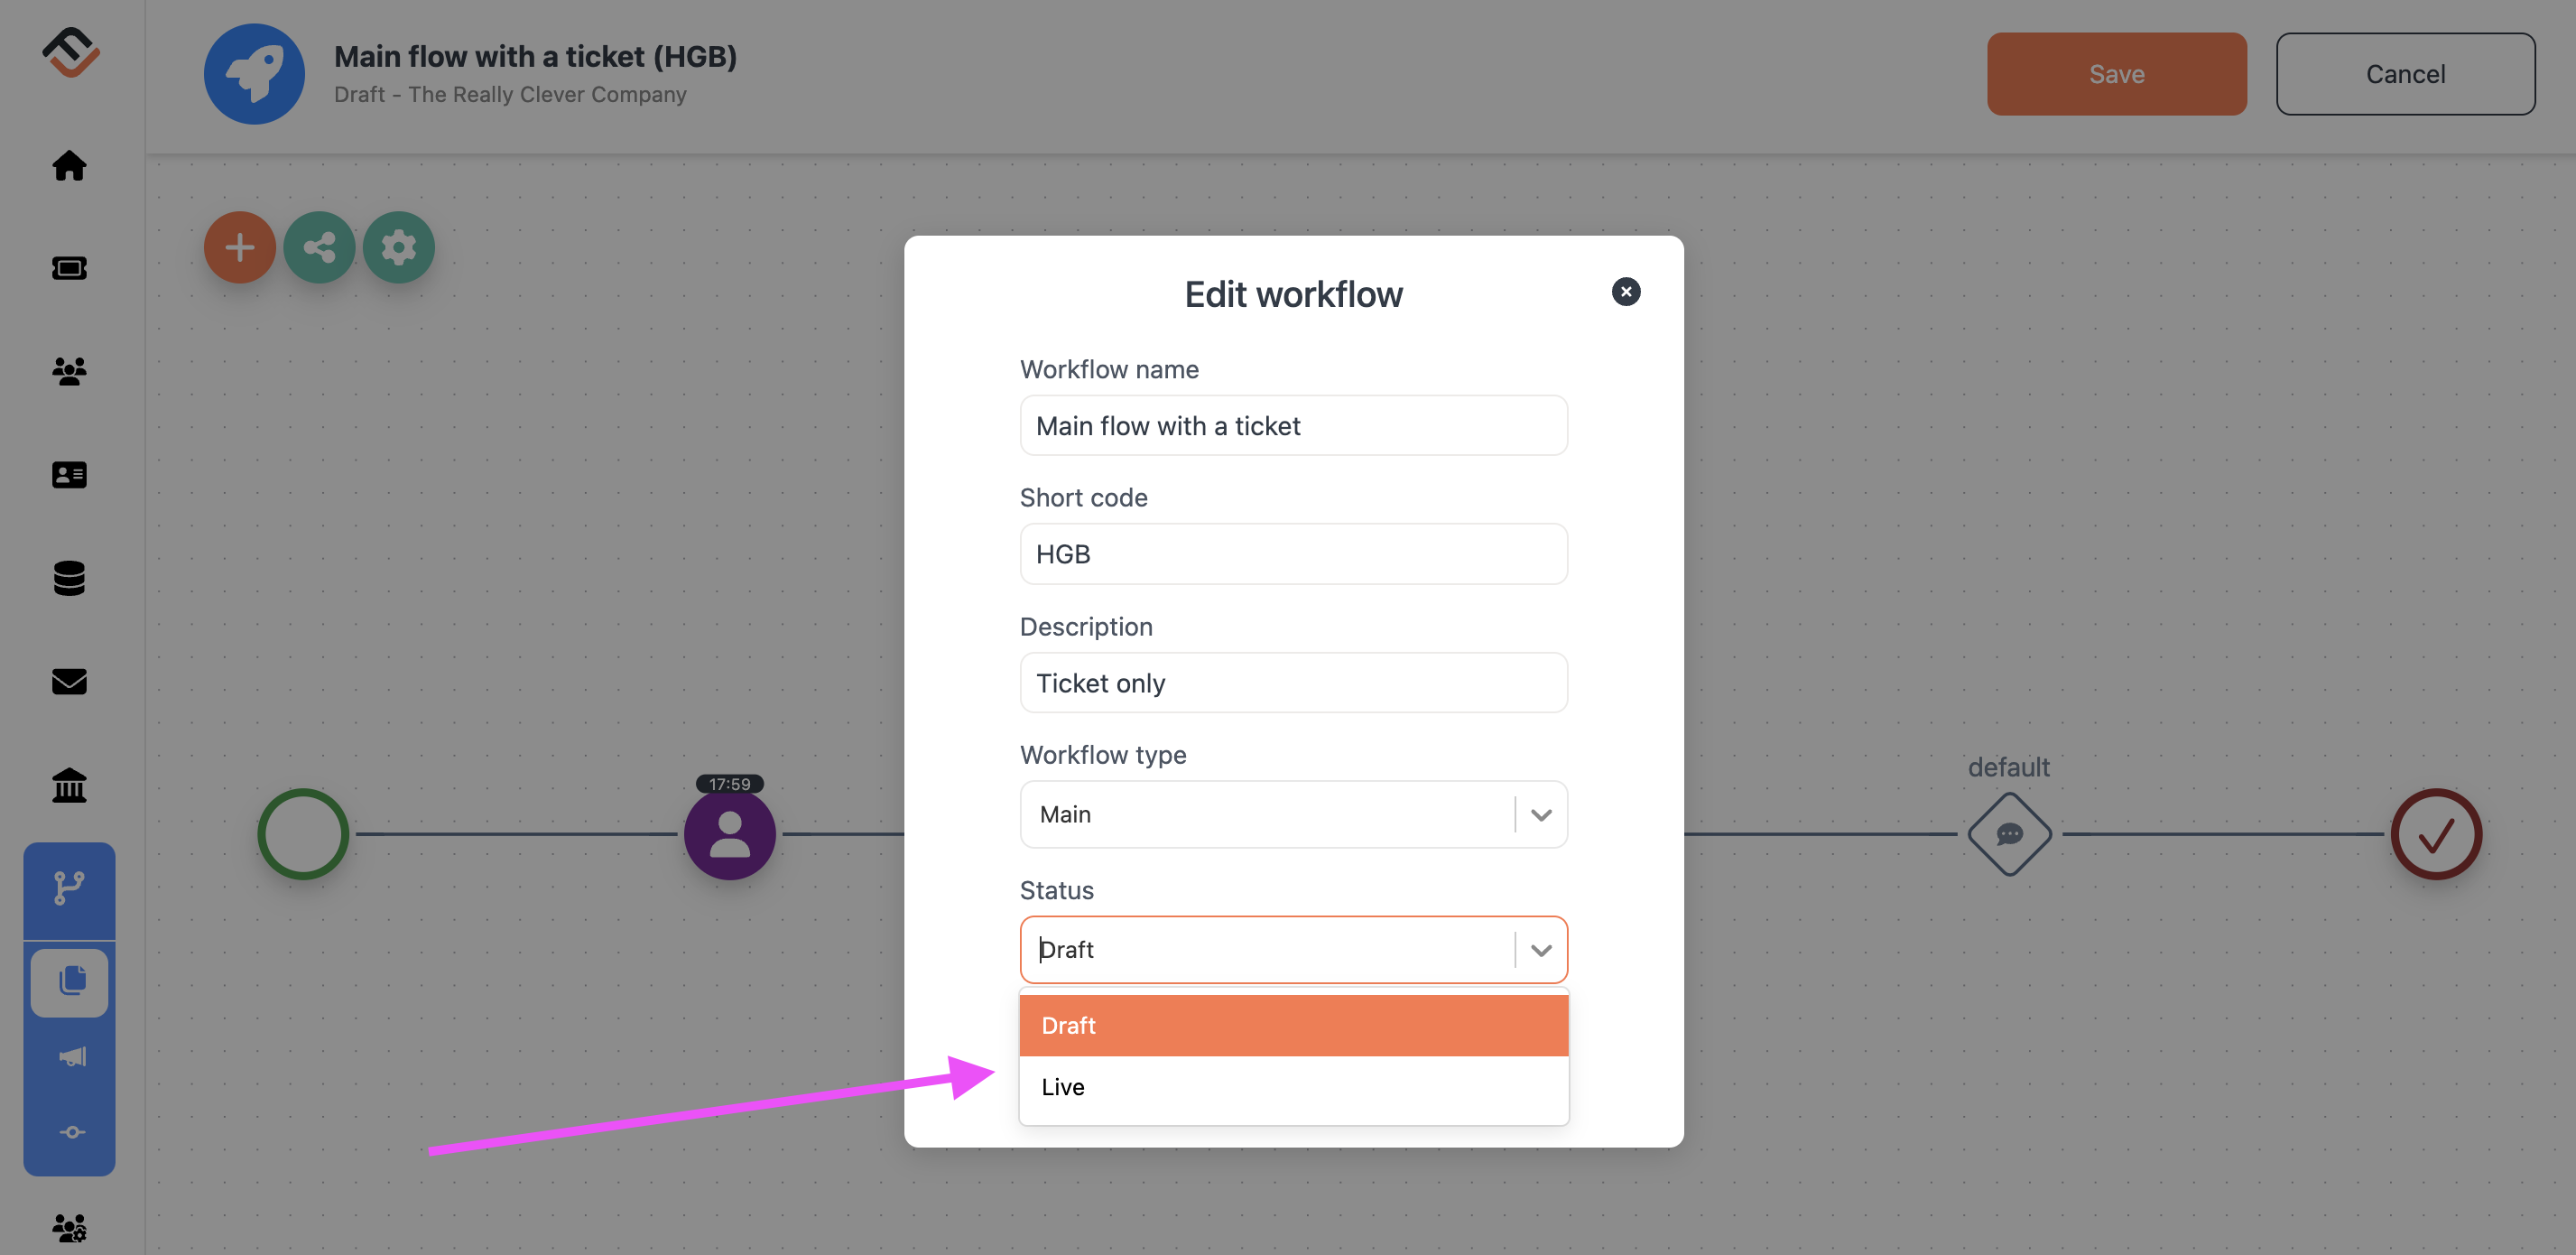
In the 'Edit Workflow' settings, you will see a field labeled 'Status'. Click on this field and change the status from 'Draft' to 'Live'. Once you've made this change, hit 'Save'.

Step 4: Return to Workflow List
After saving your changes, click 'Cancel' to exit the 'Edit Workflow' settings and return to your workflow list.
Step 5: Finalize the Activation
To complete the activation process, locate the 'Link' icon (depicted as a chain link) on the row of the workflow you want to activate. Click on this icon, and a pop-up will appear. In this pop-up, click the button that says 'Yes, set workflow'.


With these steps, your workflow is now live and activated. To verify the activation, look for the workflow tag that appears under the workflow name on your workflow list. This tag indicates that the workflow is active and ready to be used in your customer account.


